
Warning Lights on Your Dashboard and What They're Telling You
A practical reference guide to the most common dashboard warning lights, what triggers them, and when you should act immediately vs. schedule a visit.
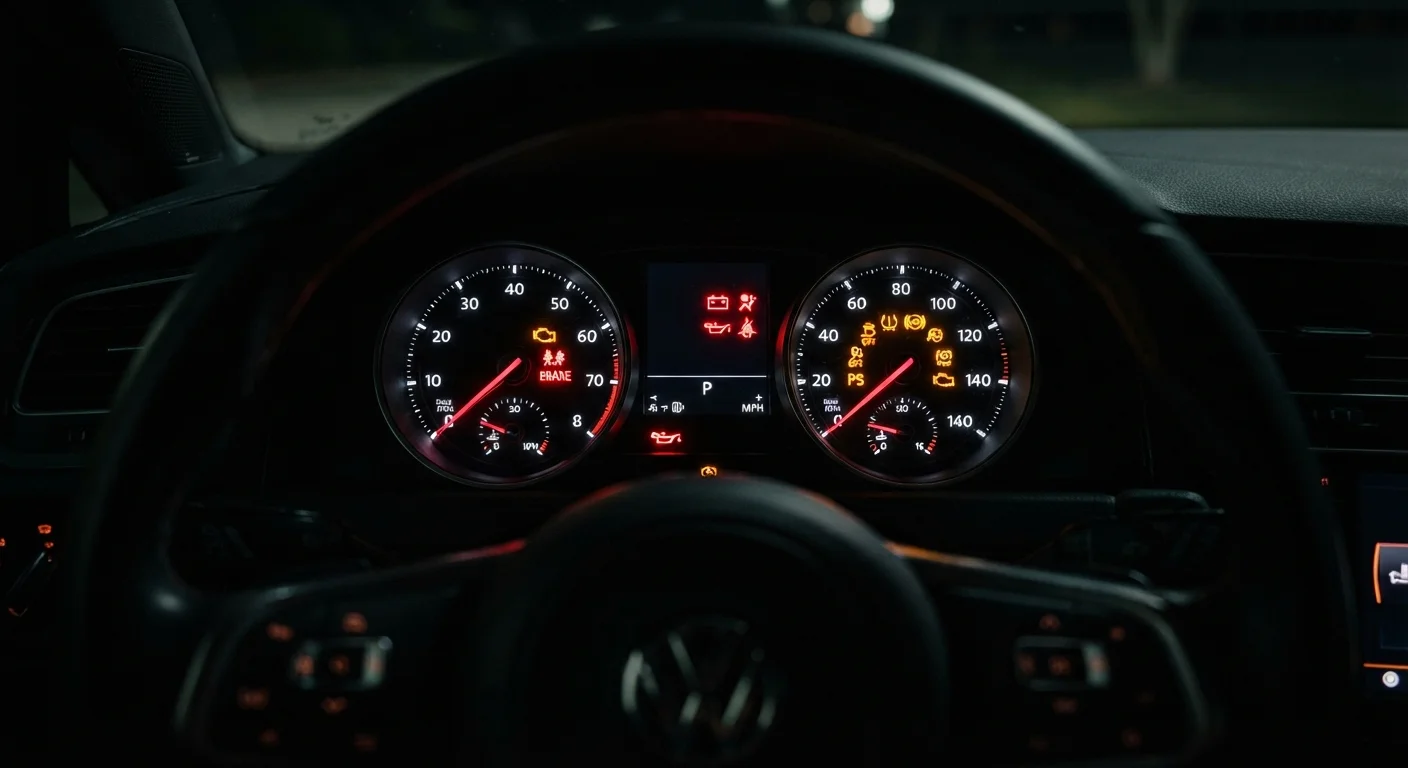
Photo: FaqsDrive.com | Smart Way To Search editorial
—— In This Article
How Dashboard Warning Lights Work
Your vehicle's onboard diagnostic system continuously monitors dozens of sensors - from engine temperature to brake pressure. When something falls outside normal operating range, the system triggers a warning light on your instrument cluster. Think of these lights as your car's way of flagging a problem before it becomes serious damage.
Warning lights generally follow a color-coded priority system:
- Red - Requires immediate attention. Stop safely as soon as possible.
- Amber/Yellow - Something needs attention soon, but you can typically finish your current trip and schedule service.
- Green or Blue - Informational only; a system is active (e.g., high beams, turn signal).
For a broader look at how your vehicle's systems work together, see our Understanding Your Car hub.
| Number of warning lights (typical modern vehicle) | 40-100+ possible indicators (Varies by make, model, and trim level) |
| Red light response | Stop safely as soon as possible |
| Amber light response | Schedule service within a few days |
| Flashing check engine light | Reduce speed; service promptly (Indicates active engine misfire) |
| TPMS low-pressure threshold (typical) | 25% below recommended PSI (U.S. TPMS federal standard (FMVSS No. 138)) |
The Most Common Warning Lights Explained
Knowing what each symbol means removes the guesswork and helps you respond correctly.
OBD-II Scanner
A diagnostic tool that connects to a standardized port in your vehicle (usually under the dash) and reads error codes stored by the car's computer. Mechanics use these to identify exactly what triggered a warning light.
Check Engine Light (CEL)
An amber warning light indicating the engine management system has detected an out-of-range condition. It can range from a loose gas cap to a failing sensor, so a diagnostic scan is needed to identify the specific cause.
TPMS
Tire Pressure Monitoring System. A sensor-based system that alerts you when a tire's air pressure falls significantly below the recommended level, helping prevent blowouts and poor fuel economy.
Catalytic Converter
An emissions control device in the exhaust system that converts harmful combustion byproducts into less harmful gases. A misfiring engine can overheat and damage it if not addressed promptly.
Instrument Cluster
The panel directly behind the steering wheel that houses your speedometer, fuel gauge, and all warning indicator lights.
Act Immediately - Red Lights
- Oil Pressure Warning (red oil can icon): Engine oil pressure has dropped critically. Pull over safely and shut off the engine. Driving without proper oil pressure can destroy your engine within minutes.
- Engine Temperature (red thermometer/waves): Your engine is overheating. Stop the car, turn off the engine, and let it cool. Do not open the radiator cap while hot. See our fluid-checking guide for coolant basics.
- Battery/Charging System (red battery icon): The electrical charging system is failing. Your car is running on battery reserve only and may stall soon. Learn more in our car battery basics article.
- Brake System Warning (red circle with exclamation): Could indicate low brake fluid, a brake system fault, or the parking brake is engaged. Verify the parking brake first; if that's not the cause, have it inspected immediately.
Schedule Service Soon - Amber/Yellow Lights
- Check Engine (amber engine outline): One of the most misunderstood lights. A solid amber light usually means a sensor or emissions issue - schedule service within a few days. A flashing check engine light signals an active misfire that can damage the catalytic converter; reduce speed and get service promptly.
- Tire Pressure (TPMS - amber tire with exclamation): One or more tires is significantly under- or over-inflated. Check and correct tire pressure as soon as convenient.
- Traction Control / Stability Control (amber car with skid lines): If this light flashes, the system is actively working. If it stays on solid, the system may be disabled or faulty.
- Low Fuel (amber fuel pump): You have roughly 30-50 miles of range remaining on most vehicles, though this varies. Refuel soon.
When to Pull Over vs. When to Drive to a Shop
Not every warning light demands an immediate roadside stop, but knowing which ones do can protect both your safety and your wallet.
When In Doubt, Don't Ignore It
A warning light that appears and disappears on its own doesn't necessarily mean the problem is gone - it may mean conditions temporarily changed. The error code is often still stored in your vehicle's computer. Having a mechanic run a diagnostic scan is the only reliable way to confirm the system is truly clear.
Stop immediately and call for help if:
- The oil pressure light is red and on.
- The engine temperature light is red.
- You smell burning, see smoke, or hear unusual knocking sounds alongside any warning light.
- The brake warning light appears and your pedal feels soft or sinks to the floor.
For situations that can wait until you reach a shop, document the light symbol, note any unusual sounds or smells, and mention all of this to your mechanic. A shop can use an OBD-II scanner (a diagnostic tool that reads error codes stored by your car's computer) to pinpoint the exact issue.
Before long drives, a quick visual scan of your dashboard is part of a smart pre-trip routine. Our road trip safety walkthrough covers this and other checks worth doing before you leave home.

Automotive Basics Editorial Team
Automotive Basics Editorial Team is the collective byline for our editorial team and contributor network. Articles published under this byline or an editorial pen name are researched, written, and reviewed according to our editorial standards for clarity, consistency, and independence before publication.
View author profile