
Checking Your Fluids: A Practical Walkthrough for Non-Mechanics
Coolant, brake fluid, transmission fluid, and more—learn how to locate, inspect, and top off your car's essential fluids safely at home.
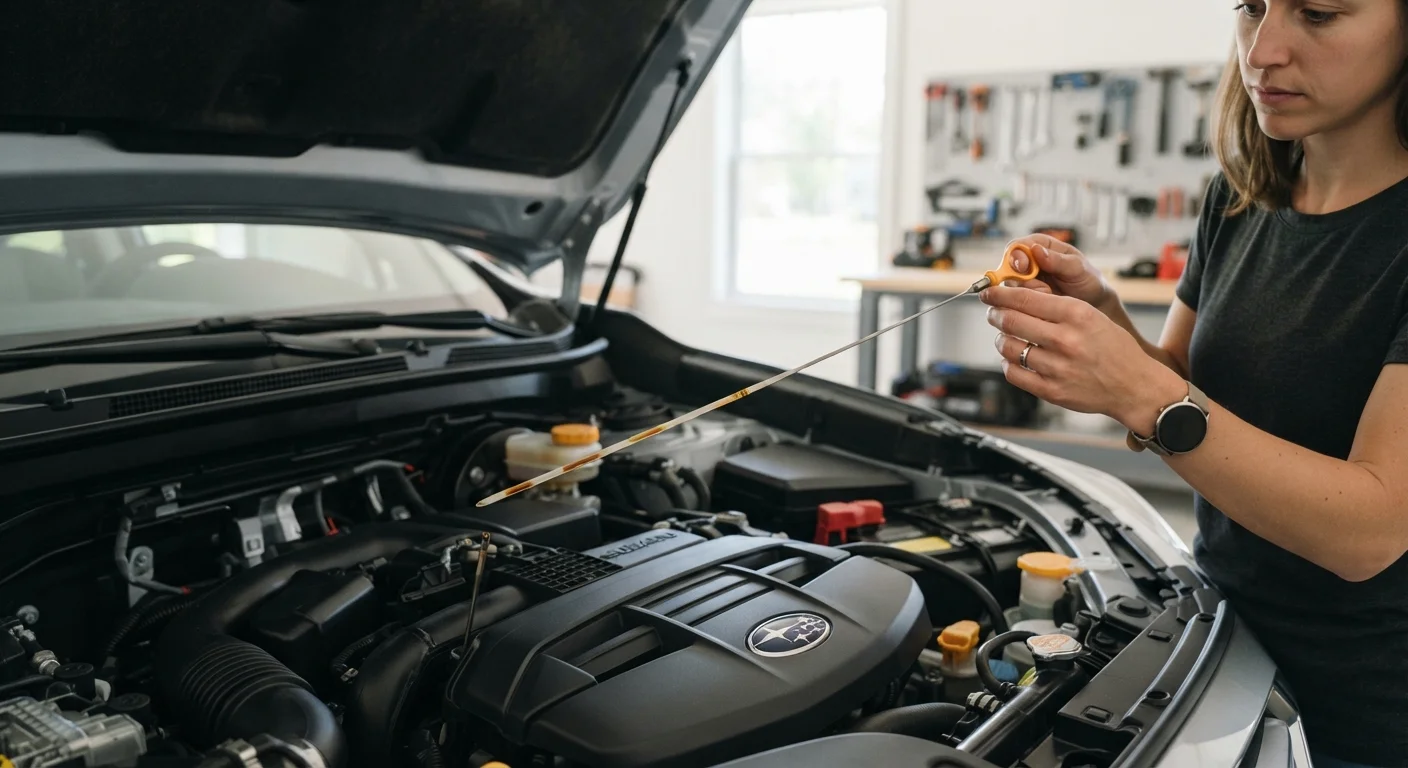
Photo: FaqsDrive.com | Smart Way To Search editorial
—— In This Article
Key Takeaways
- A cold, parked engine is the safest starting point for any fluid check.
- Six fluids matter most: engine oil, coolant, brake fluid, transmission fluid, power steering fluid, and windshield washer fluid.
- Your owner's manual specifies correct fluid types - the wrong fluid can cause serious damage.
- Low or discolored fluid often signals a leak or missed service interval - don't just top off and ignore it.
- Most fluid checks require no tools and take under 20 minutes for a beginner.
Why Fluid Checks Are the Most Valuable 15 Minutes in Car Ownership
Your car relies on six key fluids to protect its engine, stop safely, shift smoothly, and keep you with clear sightlines. Unlike many maintenance tasks, checking these fluids requires no mechanical skill, no special tools, and costs nothing. Yet skipping them is one of the most common reasons everyday drivers end up with repair bills in the thousands.
This walkthrough is designed for someone who has never opened a hood with purpose. If you're building your broader maintenance knowledge, Car Maintenance 101 provides the foundational context that makes individual tasks like this one make sense.
What you will need
Owner's Manual
Identifies the correct fluid specifications, dipstick locations, and fill cap markings for your specific vehicle.
Clean Rags or Paper Towels
Used to wipe dipsticks clean before re-inserting for an accurate reading.
Flashlight
Helps you see fluid levels clearly inside reservoirs with dark or opaque plastic.
Funnel
Prevents spills when adding fluid to narrow reservoir openings.
Step-by-Step: Checking Each Fluid
Work through the steps below in order. The whole process should take 10-20 minutes once you're familiar with where each reservoir sits in your specific vehicle. Keep your owner's manual nearby - it contains a labeled diagram of your engine bay that removes all guesswork.
Park on level ground and let the engine cool
Pull onto a flat, stable surface and turn off the engine. Wait at least 10-15 minutes before opening the hood - longer if you've been driving hard. A hot engine can produce scalding steam, and fluid levels read inaccurately when the car is tilted or the engine is still warm. For engine oil specifically, most manufacturers recommend checking it when the engine is fully cold (before starting the car for the day) for the most reliable reading.
Check the engine oil
Locate the oil dipstick - typically a brightly colored ring or handle (often yellow or orange) near the engine block. Pull it out, wipe it completely clean with a rag, reinsert it fully, then pull it out again. The oil level should fall between the two marks (MIN and MAX, or similar labels). Also check the color: healthy oil is amber to light brown. Oil that looks black and gritty is overdue for a change; oil that looks milky or foamy can indicate coolant contamination - a condition that warrants a mechanic's inspection promptly.
Inspect the coolant (antifreeze) level
Do not touch the radiator cap. Instead, look for the translucent coolant reservoir - a plastic tank usually connected to the radiator by a hose. It has MIN and MAX lines molded into the side; you can read the level without opening it. Coolant should be a bright color (typically green, orange, pink, or blue depending on formulation). A very low level or a consistently dropping level suggests a leak that should be diagnosed by a mechanic. For more on how cooling systems work, see common cooling system myths.
Check brake fluid
The brake fluid reservoir is a small, semi-transparent plastic container located near the firewall (the wall between the engine and the cabin), usually on the driver's side. Read the level through the side of the reservoir without opening it - there are MIN and MAX lines. Brake fluid should be nearly clear to pale yellow. Dark brown fluid has absorbed moisture over time and has reduced effectiveness; this is a sign it's due for a professional flush. Note that brake fluid level naturally drops slightly as brake pads wear - if it's at or below MIN, have your brakes inspected. Learn more at how your braking system works.
Check transmission fluid (if applicable)
Many automatic transmissions have a dipstick similar to the oil dipstick - check your owner's manual for its location, as some modern vehicles require the engine to be warm and running during this check (the manual will specify). Pull, wipe, reinsert, and read as you did for oil. The fluid should be pinkish-red and nearly transparent. Dark, burnt-smelling fluid indicates it's due for service. Note: many newer vehicles have sealed transmissions with no dipstick at all; these require dealer or shop service. If you're unsure which type you have, understanding your transmission type can help clarify.
Check power steering fluid and windshield washer fluid
Power steering fluid (if your vehicle has traditional hydraulic steering - many newer cars use electric power steering with no fluid) lives in a small reservoir, usually labeled with a steering wheel icon. Check the level on the reservoir's MIN/MAX markers and inspect for dark or burnt-smelling fluid. Windshield washer fluid is the one fluid that poses no safety risk if you run low, but it's the easiest to top off. Its reservoir is typically marked with a windshield/water spray icon. Use washer fluid rated for your climate - in cold regions, use a formula rated for freezing temperatures.
Use Only the Correct Fluid Type
Every vehicle has specific fluid requirements listed in the owner's manual. Using the wrong grade of oil, the wrong coolant formulation, or an incompatible brake fluid can degrade performance, damage seals, and void warranties. When in doubt, read the label on the reservoir cap and cross-reference your manual before adding anything.
What to Do After You've Checked Everything
Once you've noted each fluid's level and condition, you have three possible outcomes:
- All fluids are within range and look healthy: You're good. Log the date and check again in about a month, or per your owner's manual schedule.
- A fluid is low but looks clean: Top it off with the manufacturer-specified product. Use a funnel to avoid spills, add small amounts, and recheck the level before closing the reservoir.
- A fluid is discolored, smells burnt, or is consistently low: This is a signal to schedule a professional inspection. Don't delay - catching a small leak early is far less expensive than the damage it causes if left unchecked.
If you're preparing for a long drive, fluids are just one piece of the picture. See the pre-road trip safety walkthrough for a more complete checklist. And if a warning light comes on after your checks, understanding what the check engine light means can help you decide how urgently to act.
Build a Monthly Fluid Check Habit
Setting a recurring reminder - such as the first Sunday of every month - makes fluid checks routine before problems develop. Pair it with a quick tire pressure check and you've completed most of a basic vehicle health scan in under 30 minutes. Consistent monitoring is what turns a fluid check from a chore into genuine money savings.
Never Ignore Repeatedly Low Fluid Levels
Topping off a fluid and walking away is only appropriate if this is the first time you've noticed it low. If a fluid is consistently dropping between checks, that points to a leak or internal issue - not a normal consumption pattern. Have the vehicle diagnosed by a qualified mechanic before the underlying problem causes larger damage.

Automotive Basics Editorial Team
Automotive Basics Editorial Team is the collective byline for our editorial team and contributor network. Articles published under this byline or an editorial pen name are researched, written, and reviewed according to our editorial standards for clarity, consistency, and independence before publication.
View author profile