
Setting Up a Freshwater Aquarium for the First Time
From tank size to water cycling, this step-by-step walkthrough covers everything a beginner needs before adding a single fish.
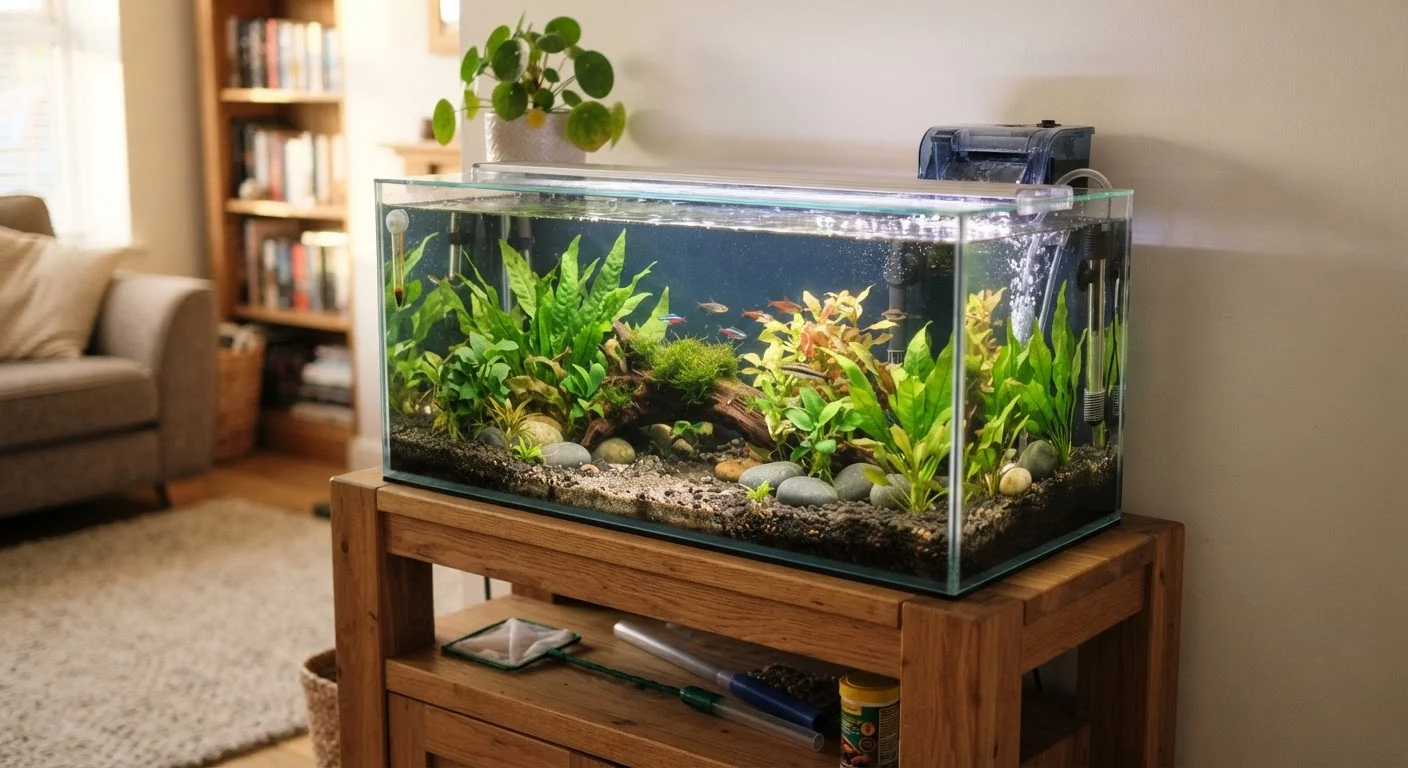
Photo: FaqsDrive.com | Smart Way To Search editorial
—— In This Article
Key Takeaways
- Bigger tanks are more stable and forgiving — a 20-gallon tank is a practical starting size.
- The nitrogen cycle must complete before adding fish, which typically takes 4–6 weeks.
- Filtration, stable temperature, and dechlorinated water are non-negotiable starting points.
- Rushing any setup step is the leading cause of early fish loss in new tanks.
- Test your water parameters regularly using a liquid test kit, not strip tests, for accuracy.
Why Setup Order Matters More Than You'd Think
Setting up a freshwater aquarium isn't complicated, but it is sequential — each step creates the conditions for the next one to work. Skipping ahead, especially past the cycling phase, is the most predictable way to lose fish early. Think of the tank as a small ecosystem you're building from scratch: the water, bacteria, and environment all need to be in balance before any living animal enters.
The good news is that most of what can go wrong is preventable with a little patience. If you've ever wondered why new fish keep dying despite doing everything you thought was right, the answer is almost always in the setup — specifically, a tank that wasn't fully cycled. Our guide on why new fish keep dying walks through these common pitfalls in more detail.
Never Skip the Nitrogen Cycle
Adding fish to an uncycled tank is the single most common reason new fish die within the first week. Ammonia accumulates rapidly without beneficial bacteria to process it, and fish experience toxic poisoning even when the water looks perfectly clear. The cycle cannot be visually detected — always use a liquid test kit to confirm it is complete before introducing any livestock.
Before you gather your equipment, it's also worth thinking through the ongoing cost of fish keeping — food, replacement filter media, water conditioner, electricity, and veterinary care for sick fish add up over time. If you're new to managing recurring hobby expenses, building a simple budget can help you plan ahead so costs don't catch you off guard.
What you will need
What You'll Need Before You Start
Having everything ready before you fill the tank prevents mid-setup scrambling that can compromise your equipment placement or water treatment. Below are the core items every beginner aquarium needs.
Aquarium tank (20-gallon recommended for beginners)
Houses your fish and plants; larger volume means more stable water chemistry.
Hang-on-back or canister filter
Removes waste, circulates water, and supports beneficial bacteria colonies.
Aquarium heater with thermostat
Maintains a stable water temperature suitable for tropical freshwater fish.
Aquarium thermometer
Allows you to monitor water temperature independently of the heater dial.
Gravel or substrate
Lines the tank bottom and provides a surface for beneficial bacteria and plant roots.
Water conditioner (dechlorinator)
Neutralizes chlorine and chloramines in tap water, making it safe for fish.
Liquid water test kit
Measures ammonia, nitrite, nitrate, and pH levels during and after cycling.
Aquarium light
Supports plant growth and maintains a natural day/night cycle for fish.
One note on test kits: liquid reagent kits are significantly more accurate than paper strip tests, which are known to give misleading readings — especially for nitrite. The small price difference is worth it when you're relying on the data to make decisions about your fish's safety.
Step-by-Step: Setting Up Your Tank
Follow these steps in order. Each one builds on the last, and the cycling step in particular cannot be skipped or shortened without risking your fish.
Choose the right tank size and location
A 20-gallon tank is widely recommended for first-time fishkeepers. Larger volumes of water are more chemically stable, meaning temperature and toxin spikes are slower and more manageable. Avoid anything under 10 gallons — small tanks fluctuate rapidly and leave little room for error.
Place the tank on a level, load-bearing surface away from direct sunlight (which fuels algae), heating vents, and high-traffic areas. The stand or surface must handle roughly 8.3 lbs per gallon when full, plus the tank and decor weight.
Rinse the tank, substrate, and decorations
Before anything goes in, rinse your tank, gravel, and any decorations with plain water — no soap or cleaning products, ever. Soap residue is toxic to fish even in trace amounts. Rinse gravel in a bucket until the runoff water runs mostly clear; this removes dust that would cloud your water.
Add substrate, decorations, and equipment
Spread 1–2 inches of rinsed gravel or substrate across the bottom. Then add any rocks, driftwood, or artificial decorations, leaving open swimming space. Install the filter and heater according to their instructions — most hang-on-back filters attach to the tank rim, while heaters are typically fully submerged near water flow for even heat distribution.
Attach the thermometer to the inside glass where you can read it easily. Position the aquarium light on the hood or lid.
Fill the tank with conditioned water
Fill the tank with tap water, then immediately add a water conditioner (dechlorinator) per the product's dosage instructions. Conditioners neutralize chlorine and chloramines that municipal water suppliers add — these chemicals are harmless to humans but deadly to fish and the beneficial bacteria your tank needs.
Fill to about 1 inch below the rim. Once filled, plug in and turn on the filter and heater. Set the heater to 76–78°F as a general starting range for most tropical community fish — adjust based on the specific species you plan to keep.
Cycle the tank before adding any fish
This is the most important and most skipped step. The nitrogen cycle establishes colonies of beneficial bacteria that convert toxic ammonia (from fish waste) into less harmful compounds. Without it, ammonia builds up quickly and kills fish.
To start the cycle, add a source of ammonia — this can be a small pinch of fish food, a few drops of pure ammonia, or a hardy "cycle fish" (though the fishless method is gentler). Test your water every few days using your liquid test kit, watching for ammonia to spike, then nitrite to spike, and finally both to drop to zero as nitrate appears. This process typically takes 4–6 weeks. Do not add your fish until ammonia and nitrite both read zero.
For a deeper explanation of this process, see The Nitrogen Cycle Explained for New Fish Owners.
Add fish slowly and in small groups
Once your cycle is complete and parameters are stable (ammonia: 0 ppm, nitrite: 0 ppm, nitrate: under 20 ppm), you're ready to add fish. Start with just 2–3 fish and wait a week or two before adding more. This gradual approach gives your bacterial colony time to grow alongside the increasing waste load.
When you bring fish home, float the sealed bag in the tank for 15–20 minutes to equalize the temperature, then slowly mix small amounts of tank water into the bag over another 15 minutes before releasing the fish. Avoid pouring the pet store water into your tank.
Start With Hardy, Beginner-Friendly Species
Fish like zebra danios, white cloud mountain minnows, and platies tolerate a wider range of water conditions and are more forgiving of minor parameter fluctuations — making them excellent choices while you're still learning. Avoid saltwater fish, fancy goldfish, or sensitive species like discus until you have more experience under your belt.
Ongoing Maintenance After the First Fish Are In
Once your tank is cycled and stocked, a consistent weekly routine will keep water quality stable. Plan on a 25–30% partial water change each week using conditioned tap water at roughly the same temperature as your tank. This dilutes nitrate buildup without disrupting the bacterial colony in your filter.
Rinse filter media in tank water — never tap water — when it becomes visibly clogged. Tap water kills the beneficial bacteria living in the media, undoing much of what your cycling period established. Most filters need a light rinse every 2–4 weeks, not a deep clean.
Watch for Early Signs of Trouble
Gasping at the surface, clamped fins, loss of color, or fish staying motionless near the bottom are all distress signals. These often point to water quality problems. Test your parameters immediately and consult Why New Fish Keep Dying if you notice these signs.
Keep a log of your water test results over time. Patterns in your readings — a nitrate spike every five days, for example — help you fine-tune your water change schedule to your specific tank and its fish load. A well-maintained freshwater aquarium can be a genuinely rewarding and low-stress hobby once the initial setup is behind you.

Pets & Animals Editorial Team
Pets & Animals Editorial Team is the collective byline for our editorial team and contributor network. Articles published under this byline or an editorial pen name are researched, written, and reviewed according to our editorial standards for clarity, consistency, and independence before publication.
View author profile