
Reading a Tape Measure, Level, and Stud Finder Correctly
Three tools beginners misuse most. Learn to read fractional inches, check for true level, and find studs reliably before your next project.
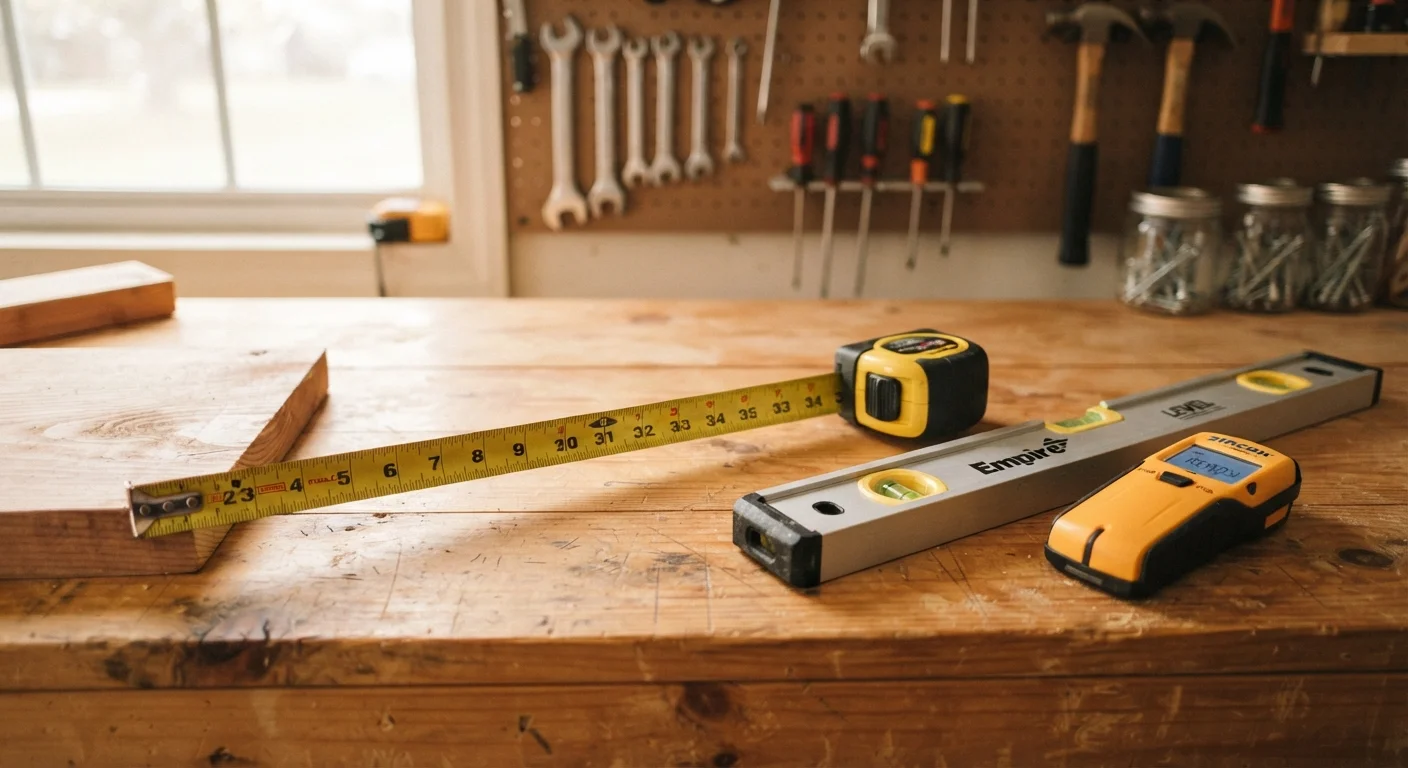
Photo: FaqsDrive.com | Smart Way To Search editorial
—— In This Article
Key Takeaways
- Tape measure markings use a hierarchy of line lengths to indicate fractions of an inch down to 1/16th.
- A bubble level must be read straight-on to avoid parallax errors that make surfaces appear level when they aren't.
- Stud finders require a slow, steady pass and a calibration step before each use to deliver reliable results.
- Always confirm a stud location with a second scan in the opposite direction to rule out false readings.
- Mastering these three tools reduces wasted materials and helps prevent common DIY project failures.
Why These Three Tools Trip Beginners Up
Most early DIY mistakes don't come from poor effort — they come from misreading a tool or skipping one small but essential step. A shelf installed half an inch off because of a misread tape measure, a picture frame that drifts visibly downhill because the level was read at an angle, a TV mount that pulls out of the wall because the stud finder's reading wasn't verified: all of these are avoidable once you understand how each tool actually works.
This guide is a companion to our overview of essential hand tools, which covers the broader toolkit. Here, we go deep on just three tools that appear in nearly every basic home project — and that beginners most consistently misuse.
What you will need
Ready to put these skills to use? See our guide to tackling your first weekend project for a complete beginner-friendly walkthrough.
Step-by-Step: Using All Three Tools Correctly
Follow these steps in order. The tape measure and level skills can be practiced on any surface; the stud finder steps require a drywall wall.
Tape Measure (25 ft)
Measures distances accurately for cutting, spacing, and layout tasks.
Spirit Level (24–48 in)
Verifies that a surface, shelf, or fixture is truly horizontal or vertical.
Electronic Stud Finder
Detects the framing behind drywall so fasteners can be anchored securely.
Pencil
Marks measurements and stud locations on walls or materials without permanent damage.
Small finish nail
Used to physically confirm a stud location before driving a permanent fastener.
Read the tape measure's fraction markings
Unroll several inches of tape and look at the graduated lines between each inch mark. The longest line between two inch marks is the half-inch (1/2"). The next longest lines mark quarter-inches (1/4" and 3/4"). Shorter lines mark eighths, and the shortest lines mark sixteenths (1/16"). To read a measurement, identify the last full inch the blade has passed, then count the fractional lines beyond it. For example: 7 inches plus three small lines past the half-inch mark equals 7 and 9/16 inches.
Hook the tape correctly for inside and outside measurements
The metal hook at the tape's end is designed to slide slightly — about 1/16 inch. This is intentional: when hooked over an outside edge, the hook extends outward; when pressed against an inside corner, it compresses. Both positions yield accurate measurements. For inside measurements (such as inside a cabinet opening), press the tape body against one wall, read the number at the opposite wall, and add the width of the tape body printed on the case — typically 2 or 3 inches.
Position yourself correctly to read the level
Place the level flat on the surface (or hold it vertically against a wall). Crouch or adjust your height so your eye is directly in line with the vial — the small liquid-filled tube. Looking at the vial from an angle causes a parallax error: the bubble appears to sit between the lines even when the surface is not truly level. When your eye is perfectly level with the vial, the bubble will appear as a crisp shape centered between the two etched lines.
Calibrate your stud finder before each scan
Hold the stud finder flat against the wall in an area you're confident contains only drywall — not directly over a stud or electrical box. Press and hold the activation button until the device signals it's ready (a beep or a light, depending on the model). This step lets the tool measure baseline drywall density. Skipping calibration is the most common reason stud finders give false readings.
Scan slowly from left to right and mark both edges
Starting at least 6 inches to the left of where you expect the stud, press the stud finder firmly against the wall and slide it slowly and steadily to the right. When the device signals a stud edge (beep, light, or displayed indicator), mark the wall with a pencil. Continue sliding until the device signals the opposite edge of the stud and mark that position too.
[tip_callout]Confirm the stud with a second pass from the opposite direction
Reposition the stud finder 6 inches to the right of your second mark and scan back toward the left. The device should signal stud edges within about 1/4 inch of your original marks. If the two passes agree, split the difference between the left and right marks to find the stud center, and mark it clearly. If the passes disagree by more than 1/2 inch, recalibrate and repeat — the wall may contain a seam, patch, or other anomaly.
Never Skip Stud Confirmation Before Anchoring
Driving a heavy fastener into drywall — instead of a stud — can cause shelves, TVs, or cabinets to fail under load. Always verify your stud finder's reading with a second pass from the opposite direction, and consider driving a small finish nail just above your finished line as a final confirmation. If the nail slides in easily with no resistance, you've missed the stud.
Getting accurate readings from these tools also matters when you're estimating project costs. Measurement errors often lead to buying the wrong quantity of materials — a common factor in budget overruns. For more on avoiding that, see how homeowners underestimate renovation costs.

Home & Garden Editorial Team
Home & Garden Editorial Team is the collective byline for our editorial team and contributor network. Articles published under this byline or an editorial pen name are researched, written, and reviewed according to our editorial standards for clarity, consistency, and independence before publication.
View author profile